American Sewing Guild (ASG)

Visit our blog Visit the ASG Facebook page Visit ASG on Pinterest Visit ASG's YouTube channel Visit ASG on Instagram
  • Home
  • Join ASG
    • Join Online
    • Chapter Locations
    • Member Benefits
    • Member Brochure
    • Join by Mail
  • Education & Classes
  • Resources
    • Contests & Awards
    • Giving Back
    • Hall of Fame
    • Travel and Tours
    • Measurement Chart
  • Shop
    • ASG Store
    • Chapter Products
    • Video Resources
  • Blog
  • About
    • About Us
    • Donate to ASG
    • ASG Sensitivity Statement
    • FAQ’s
    • Start a Chapter
  • Contact
  • Member Login
    • Login First!
    • Members Only
    • Leadership Only
    • Website FAQ’s
    • Logout
  •  

December 4, 2020

Border Prints 101

When shopping for fabric, we’re accustomed to seeing rows of bolts with an allover print. But look a little deeper and you’ll find some with unique features—border prints! Border prints are fun to work with and allow you to showcase this print feature in creative ways.

What is a border print?
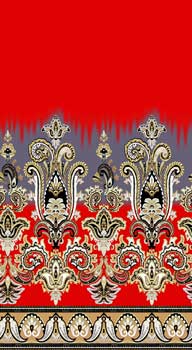
Instead of a fabric having the same patterning across the full width of the fabric, border prints have a different pattern along one or both edges. The bands of distinct prints can be narrow or wide, and can extend their emphatic look across the fabric’s full width in some instances creating a beautiful graphic element.

  • A double border print may have the same or differing designs along each fabric edge. A common pairing is to have one narrow border and one wider one.
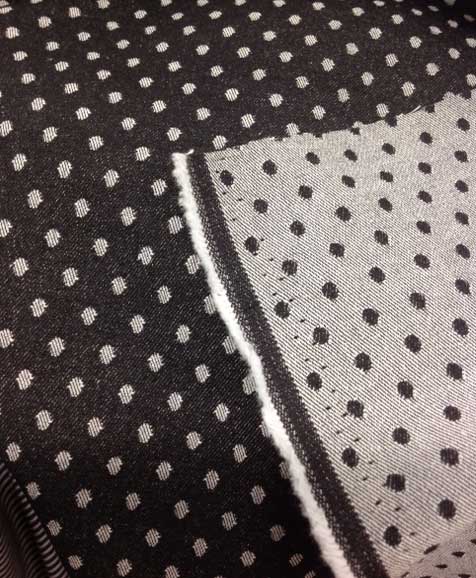
  • A border print is parallel to the fabric’s selvage, ready for showcasing in a garment, accessory or quilt and can be found on a woven fabric or along the cut edge of a knit.
  • Another type of fabric considered a border print has a lengthwise edge detail like scallops or fringe along one or both sides.

Working with a Border Print
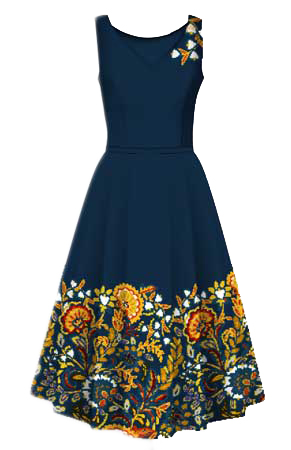
The primary difference in working with a border print is that the project needs to be on the crosswise grain of the fabric, rather than the traditional lengthwise spec. The design area is best showcased along a straight edge, like a skirt or sleeve hemline, pant leg, jacket hem, etc., though it doesn’t need to be at the bottom of a garment. The border can also be used along a pocket edge, in a bodice area or even at the waistline.

If you prefer to use the border vertically instead of horizontally, think about a jacket front, wrap skirt or side-seam accent. If you choose this orientation, be sure the border design isn’t directional—for example, you probably don’t want flower stems horizontal on a jacket front, or people lying down along a wrap skirt edge. The print should really be non-directional for vertical use.

Border prints can also be used to accent small areas, like collars and cuffs, totes, etc., and are also ideal for home décor projects, like on a curtain hem, pillow or quilt border.

Like any distinct print, matching is always a good idea, so consider where you may need to match a distinct pattern before you begin cutting. A hemline border should match at the side seams to avoid breaking the visual patterning.

Pattern Adaption
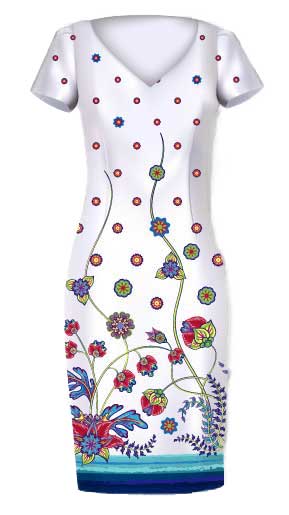
Some patterns are designed specifically to be used with border prints, but most are not. Look for designs with straight edges, like a gathered or pleated skirt, if you want to feature the print along the hemline.

  • If the area you want to use the print in is curved, you’ll need to straighten it or risk losing part of the border to the curve.
  • Redraw your pattern’s grainline to reflect the new orientation on the fabric. Use a ruler to change up the standard grainline 90°. Double check the fabric width to accommodate the new orientation.
  • Since some border prints are close to the selvage, it may be necessary to modify a hem depth if you want to use the print along the bottom of a skirt. A narrower hem, or a faced hem, could both be options depending on the design placement.

Yardage Adaptation

The amount of yardage needed for a border print will likely differ from what was originally called for if the garment was originally cut on the lengthwise grain. After redrawing the grainline on the pattern pieces, do a test layout to refigure the fabric before purchasing. Keep in mind that it’s best to cut all the garment pieces on the same grain to avoid any variance in directional prints or shading.

The width of the fabric may limit the use of the border on certain garments, or require you to piece a garment if you’re intent on using a particular fabric.

Note that you can also trim off the border and reattach it if needed, to get the look you want in your project.
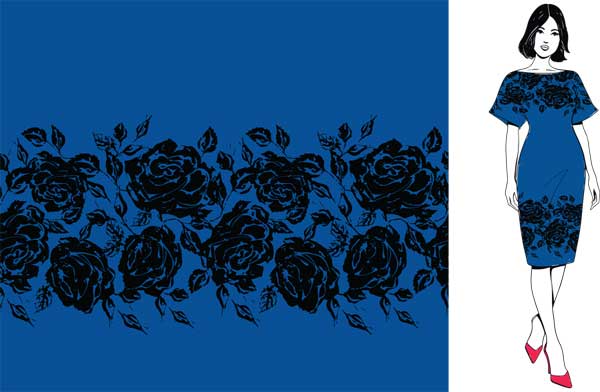
Now that you know more about them, when you see a border print fabric, think about how you can showcase it in your next project!


~Linda Griepentrog
Linda is the owner of G Wiz Creative Services and she does writing, editing and designing for companies in the sewing, crafting and quilting industries. In addition, she escorts fabric shopping tours to Hong Kong. She lives at the Oregon Coast with her husband Keith, and two dogs, Yohnuh and Abby. Contact her at gwizdesigns@aol.com.
This field is for validation purposes and should be left unchanged.
Did you enjoy this article?
Are you an ASG member?

Tagged With: border prints, fabric, garments, textiles

November 27, 2020

Fast and Easy Fringed Edge Finishes

If you’re looking for a fast and easy edge finish, there’s nothing easier than fringe! It works on single-layer placemats, scarves, patches and pockets, or with a little more effort, you can insert fringe into a seam or hem.

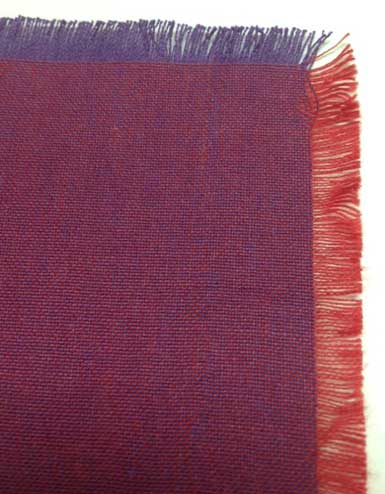
The results of fringing are not always what you expect, as some fabrics are woven with different color threads going lengthwise and crosswise, so you get totally different colors in one direction from the other. Denim is a good example, as white threads are usually used one way and indigo the other.

The Basics

Select a woven fabric (knits cannot be fringed using this technique). Fabrics like linen, burlap, gauze, wools and bouclés are ideal candidates. The looser the weave, the easier the fringing process.

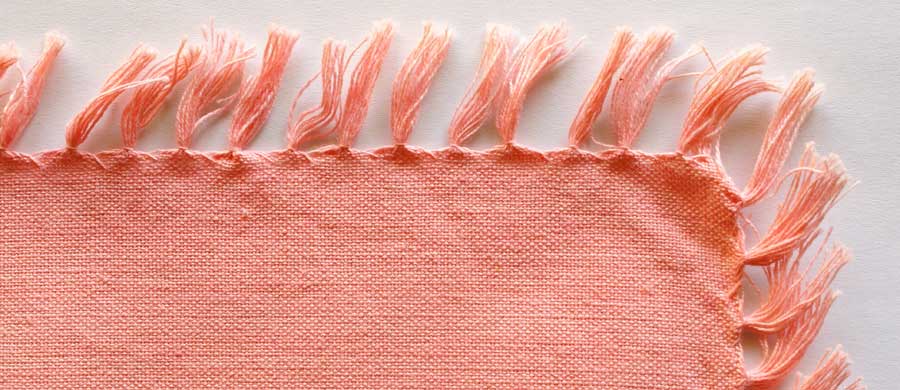
  • To create a simple fringe, be sure your project edge is cut parallel to the fabric grain. Sew a line of stitching where you want the fringe to stop, then start pulling threads up to the stitching line. The stitching thread can match the fabric or contrast with it.
  • For easier removal, use a needle or a large pin to help separate the fabric threads and gently pull them across the fringed area. Note that if your project has a right-angle corner (like a scarf), there will be a gap in the thread fringe at the corners.
  • If you want to knot the fringe, either singly or with thread groups, allow extra length for that process. Test-fringe a sample to see how much length you need for either a square knot or an overhand knot.
  • For a top-fringed pocket, cut the pocket top on the straight grain and extend it the desired fringe length (no hem). For a fringed sleeve hem, determine the sleeve length, then extend the lower edge the desired fringe length, being sure to keep a straight grain edge.
  • Single-layer scarves can be fringe-finished on all edges or just the ends, like on a muffler.

Inset Fringe

  • Inserting fringe into a seam allows for more placement flexibility and allows for placing it on a curve as well.
  • To make a fringe strip, cut a straight grain strip the desired width of the fringe, plus the requisite seam allowance. Stitch and fringe as noted above. On very loosely woven fabrics, layer two strips for a denser fringe.
  • Use the fringe strip as you would a piping, basting it along one layer of the seamline with the fringe facing the bulk of the project. Then top with the second layer of the project, and sew just inside the basting line. When you turn the project right side out, the fringe will extend beyond the seamed edge.
  • For long fringe strips, simply abut the ends of multiple fabric strips as needed. If you need a bulkier fringe, layer two strips atop each other and treat as one layer.

Design Tip: inset fringe can be made from matching or contrasting fabric.

Trim Tactics

If desired, you can add a ribbon or trim along the stitched edge of fringe as an accent, whether it’s single layer or inserted into a seam.

Don’t forget to check the selvage of your fabric, as some have fun fringes that can be used as is, and they already match!


~Linda Griepentrog
Linda is the owner of G Wiz Creative Services and she does writing, editing and designing for companies in the sewing, crafting and quilting industries. In addition, she escorts fabric shopping tours to Hong Kong. She lives at the Oregon Coast with her husband Keith, and two dogs, Yohnuh and Abby. Contact her at gwizdesigns@aol.com.
This field is for validation purposes and should be left unchanged.
Did you enjoy this article?
Are you an ASG member?

Tagged With: fringe, fringed edges, jacket, jeans, knotted fringe, learn to sew, placemats, scarves, sewing tip

October 2, 2020

Sewing with Multi-Color Threads

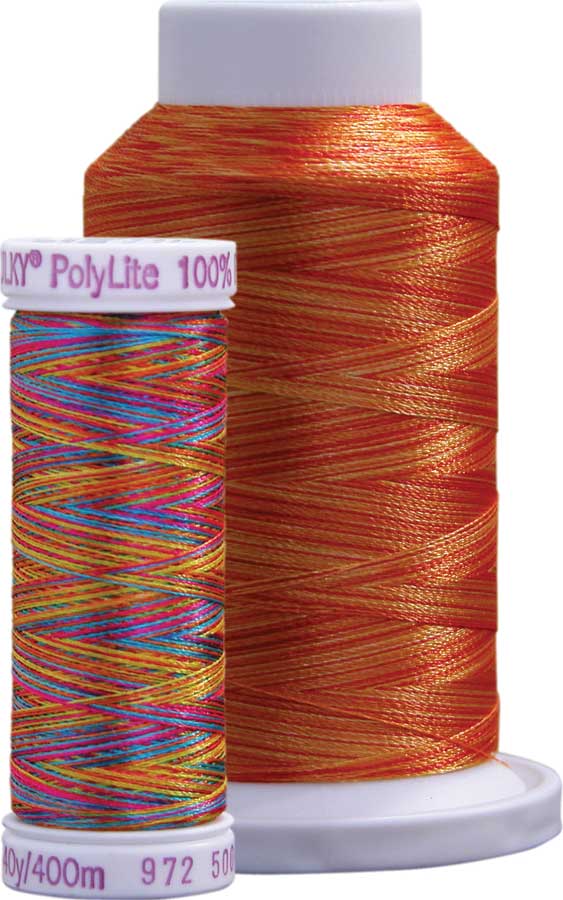
Sulky PolyLite Thread

The sewist’s crayons!

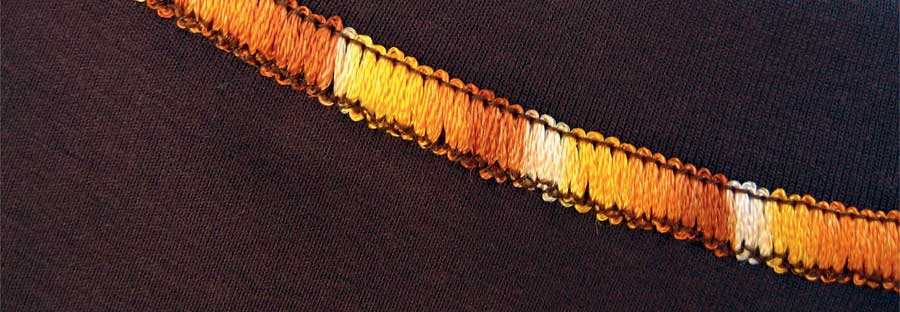
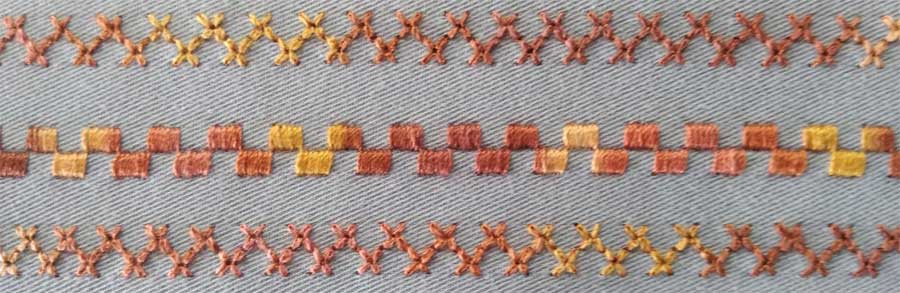
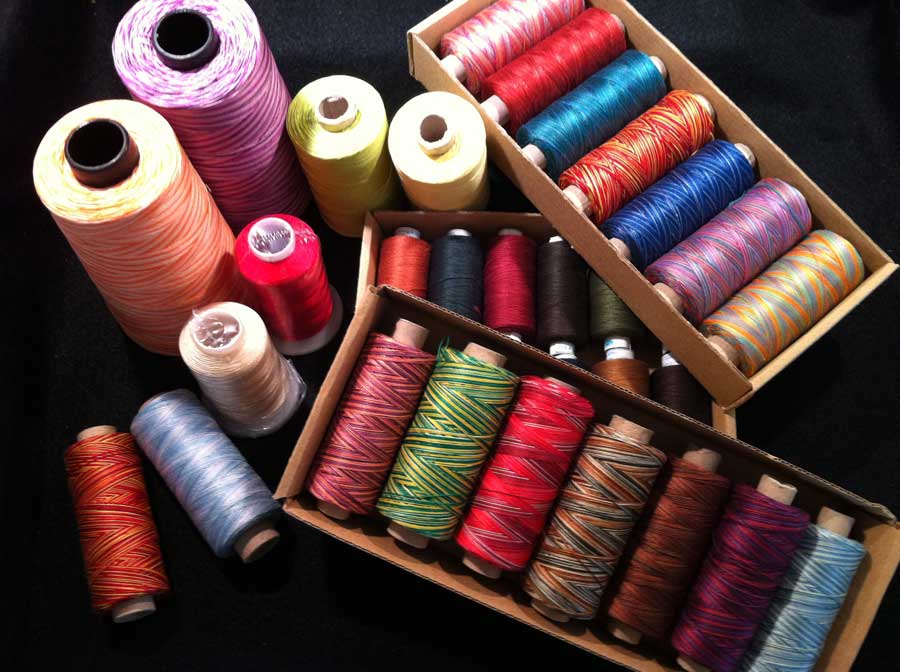
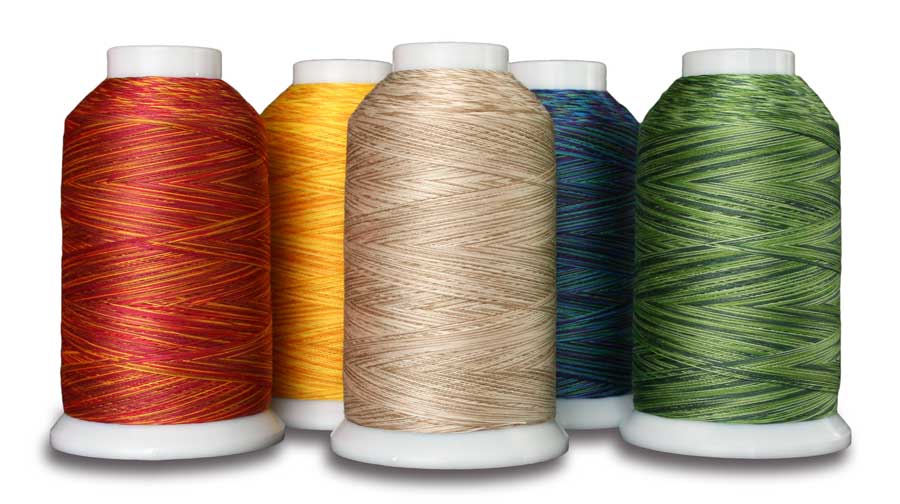
Not really designed for construction, variegated threads are multiple colors within a single strand. When you look at a spool, you may see distinct color patterns or simply a blending of similar colors, depending on the brand, how the thread is dyed and how it’s wound on the spool or cone. Stitching with these threads on your sewing machine also produces differing results. Sometimes, surprises happen unexpectedly!

The spacing and repetition of colors within the spool vary by thread type and brand. Some multi-color threads repeat colors in a regular sequence, others offer random color repeats and others may change hue every inch, or every few feet. Colors can be related by shade, such as a light, medium and dark tone of the same color, or they can be bold contrasting colors, like a mix of red, white and blue within the same strand.

Sometimes the color change is distinct, abruptly changing from one to the another, but more often the changes are gradual with a melding from one shade to the next.

How the thread is dyed determines how it stitches out, in combination with other factors like stitch length and width, and the actual stitch selection.

Look for variegated threads in multiple fiber options—cotton, polyester, rayon, metallic, silk and texturized nylon. They also come in different thread sizes, depending on the use. Heavier weights are ideal for multi-color free-motion quilting.

Stitch Subtleties

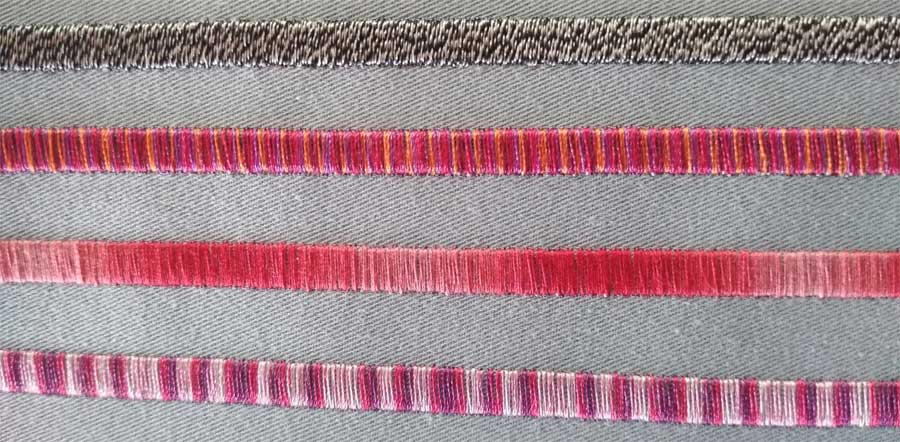
Variegated threads can be used in a number of ways. Satin stitching takes on an entirely new persona creating stripes of color—either distinct or melding.

Top to bottom: Sulky Ultratwist, Superior Rainbow, DMC Cotton, Sulky PolyLite
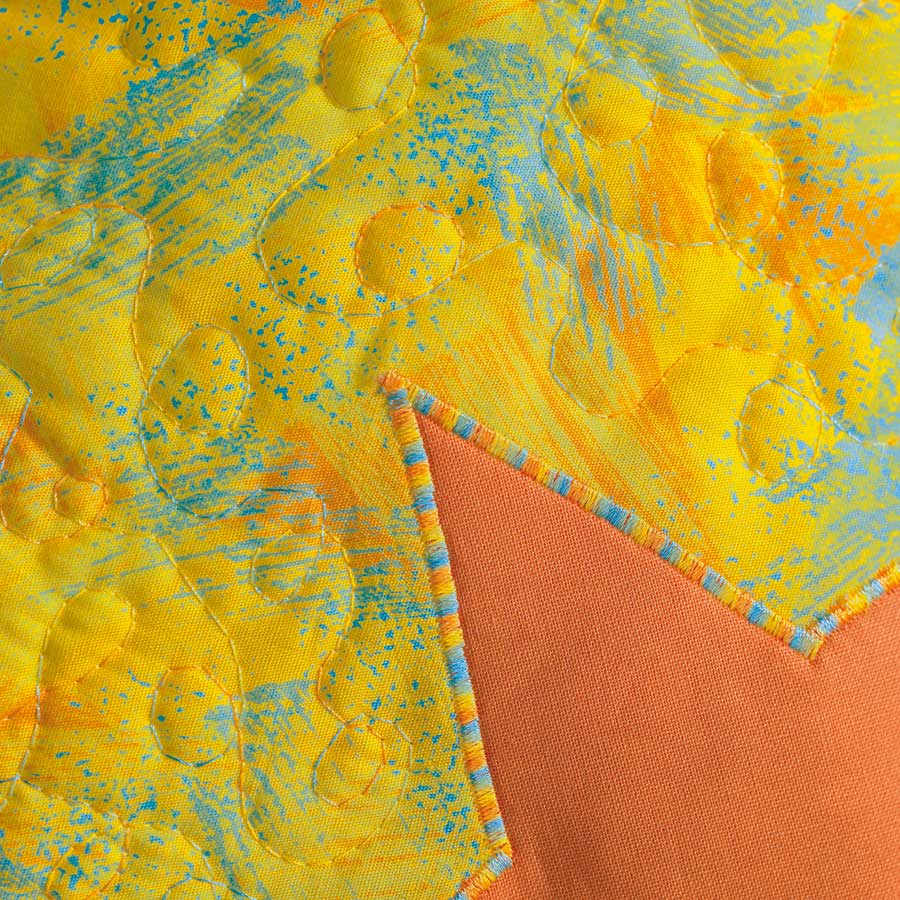
Appliqué using variegated thread; photo by Bernina

A striped appliqué edge is interesting as well. Topstitching with variegated thread is fun, free-motion quilting allows for blending colors found in fabric prints, and the world is your oyster with decorative machine stitches.

When selecting decorative stitches, look for those that are formed only with a forward motion for the best color clarity. If you choose reverse-motion stitches, you can end up with slightly different colors on top of each other as the stitch is formed.

Variegated thread also makes interesting serging stitching lines, whether used as an edge finish or for flatlocking within a garment. Unless both sides show, use the variegated thread only in the upper looper and needle, along with a coordinating solid in the lower looper.

Machine embroidery is a great place to use variegated threads for either subtle or bold shade changes. But, be aware that depending on the thread patterning, you can end up with stripes in your programmed design.

Before committing to a project, be sure to test-stitch with the variegated thread and stitch settings you plan to use to see how the color variations will actually stitch out. Or, better yet, try the same design with different variegated thread types and brands.

A New Twist

Valdani hand-dyed cotton

Another type of multi-color thread is twisted thread—two or three plies of different colors twisted together to create a heathery look. Look for analogous color shades (like light blue and dark blue) creating a denim look, or more contrast in colors for bolder effect.

Twist threads are ideal for embroidering animal motifs with fur or feathers, topstitching and decorative stitching where you don’t want stripes to be prominent.

Hand Sewing

There are several types of hand-stitching threads available with multi-coloration. Look for embroidery floss and fine wools, as well as multiple sizes of variegated pearl cottons.

Superior King Tut thread

So, add some color changing to your world!


~Linda Griepentrog
Linda is the owner of G Wiz Creative Services and she does writing, editing and designing for companies in the sewing, crafting and quilting industries. In addition, she escorts fabric shopping tours to Hong Kong. She lives at the Oregon Coast with her husband Keith, and two dogs, Yohnuh and Abby. Contact her at gwizdesigns@aol.com.
This field is for validation purposes and should be left unchanged.
Did you enjoy this article?
Are you an ASG member?

Tagged With: stitches, thread, variegated thread

September 4, 2020

Pearl Cotton… in Your Sewing Machine?

You’re probably familiar with pearl cotton for hand stitching efforts like cross-stitch, embroidery, smocking, threadwork and also for crocheting, but did you know that you can also use it in your sewing machine?

Finca Perlé by Presencia. Photo courtesy of Colonial Needle Company

Pearl cotton is a two-ply, twisted thread with a high sheen and it comes in a multitude of colors and some variegations. It’s available by the skein or by the ball, depending on the quantity you need.

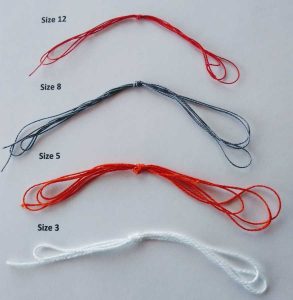
The thread is categorized by its strand size, you’ll find size #3, 5, 8 and 12 to be the most common sizes–the higher the number, the smaller the thread diameter. All four of these sizes can be used with machine sewing, but perhaps not as you might think.

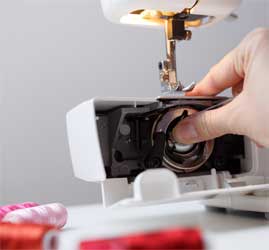
Pearl cotton needs to be used in the bobbin of the machine, not on the top, so you’re stitching with your project upside down! The good part about that is that you can draw lines or shapes to follow on the back of your project and no one will know.

On most machines, you can wind pearl cotton onto the bobbin using the standard bobbin-winding mechanism. Be careful not to overfill the bobbin so that it still moves freely in the bobbin case. For large projects, wind multiple bobbins before you begin. If need be, you can also wind the bobbin by hand, keeping it even as you wind.

Did you know that the name of this thread can be spelled pearl, perle or perlé, depending on the manufacturer?

Thread Tales

For a top thread, there are several options—matching thread, invisible thread or a contrasting thread—depending on the desired finished look. So, do some test stitching to check the results of these thread options.

Choose a stitch that’s fairly open, as satin-stitch designs can easily jam with the larger than normal thread. Watch for reverse pattern stitches where the needle penetrates the fabric in the same place, as the thread build-up at a single point can break needles. Most utility stitches and openwork decorative stitches work well with pearl cotton. Straight stitch is ideal for topstitching and quilting.

Making it Happen

Insert the bobbin in the machine, bypassing the bobbin tension spring. Use the handwheel to bring the bobbin thread to the top so you can hang onto it as you begin sewing. Turn off any automatic thread cutting feature.

With the wrong side of your project up, stitch slower than you normally would. If your design doesn’t begin or end in a seam, bring the thread ends to the fabric underside and tie off to secure. For quilts, bury the tails between the layers.

Because the bobbin can only hold a limited amount of this heavier thread, you may not be able to stitch great distances, so if you run out of thread in the middle of something, simply bring the ends to the underside, tie off and begin again exactly where you left off.

Playing with Pearl

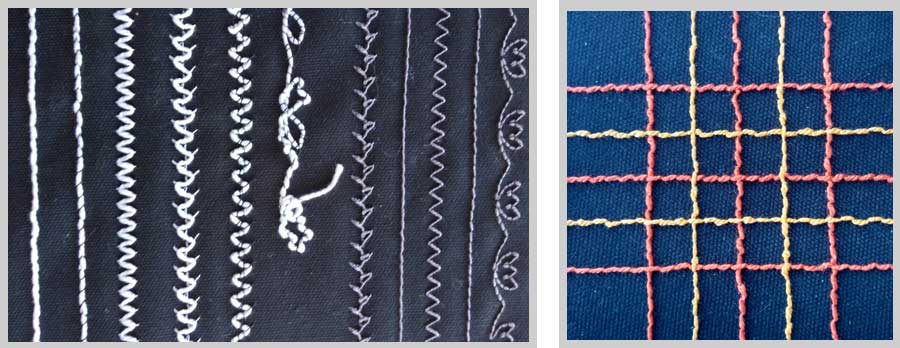
Once you get going playing with pearl cotton, you’ll have lots of fun thinking of new things to try. Try the same stitches in different weights. Create plaid with two colors and just a straight stitch. Try altering the thread tension as well to vary the looks and create added texture and color.

Pearl cotton comes in several weights:
Left image: Compare the weights—size 3 (white) and size 8 (gray)
Right image: Size 5 pearl cotton, straight stitch “plaid”

~Linda Griepentrog
Linda is the owner of G Wiz Creative Services and she does writing, editing and designing for companies in the sewing, crafting and quilting industries. In addition, she escorts fabric shopping tours to Hong Kong. She lives at the Oregon Coast with her husband Keith, and two dogs, Yohnuh and Abby. Contact her at gwizdesigns@aol.com.
This field is for validation purposes and should be left unchanged.
Did you enjoy this article?
Are you an ASG member?


Tagged With: pearl, pearl cotton, perle, thread

August 28, 2020

Choosing a Fusible

When fusible products first arrived into the home sewing marketplace, they were stiff and frequently made the fabric bubble or wrinkle due to adhesion issues. Today, these new and improved heat-activated adhesive products are a boon to our sewing tasks. Let’s take a look at some of what you’ll find to expedite your sewing adventures.

Fuze News

Woven, non-woven and knit interfacings in myriad weights and colors eliminate tedious basting of sew-in varieties. They add stability to collars and cuffs, buttonholes and placket openings, as well as to entire garment sections. Fusible interfacing can also be pre-cut into strips with built-in fold lines, like for a waistband or placket application.

Appliqué

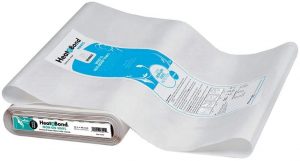
For appliquérs, check out the variety of fusible webs. Note that some are very open mesh for a lighter fuse, while others are an extruded film for a more secure hold. Look for them with or without any paper backing—on one or two sides. Fusible webs are available by the yard, in pre-cut sheets or in narrow tape sizes for hemming, applying trim, etc. Some webs are repositionable, adding permanency only when they are heat activated; other web products can be inkjet printed with pattern shapes.

Machine Embroidery

For machine embroiderers, there are numerous types of fusible stabilizers—some permanent, some temporary.

Quilting

Fusible - web tape on bindingFor quilters, there’s fusible fleece, a needle-punched product, and several types of fusible battings, both single and double-sided, depending on their use. Narrow fusible web tape is ideal for adhering binding to the quilt—just position it along each edge, peel the protective paper and fuse in place for a secure hold while stitching.

Piecing

For piecing batting, look for fusible tapes designed to span the joining seamlessly.

Purses & Totes

For purse and tote aficionados, look for fusible heavy craft interfacings and fusible foams (single- or double-sided). They hold tight to keep bags in good shape.

Tailoring

If you’re a tailoring guru, there’s fusible stay tapes designed to keep shoulders and roll lines sturdy. They’re available in straight and bias grains, depending on the use. These tapes are also great for maintaining shoulder shaping in knit T-shirts, and keeping ripple-less hem shaping. For shaping jacket and coat sections, look for fusible hair canvas.

Other Fusibles and Uses

Buy on Amazon
Fusible Vinyl
  • Need to add a little protection to your project? Look for clear fusible vinyl in either matte or shiny finishes.
  • Have trouble making even piping? Look no further than Wrap ‘n Fuse Piping. Its core is surrounded by fusible web, so all you have to do is add fabric—no stitching required.
  • There are a host of fusible ribbons and trims, as well as fusible thread. The latter is used when just a hint of fusible is needed, like for a hem edge or holding a pants crease in place.
  • For a secure closure, you can use fusible hook-and-loop tape—no sewing required.
  • If you need to convert a non-fusible product into a fusible, look for spray fusibles—heat-activate after spraying for a permanent adhesive. Or check out powdered fusibles—just sprinkle over the surface, then heat to fuse.

Save your pattern!
If you have a pattern that you love and make repeatedly, fuse lightweight interfacing to the tissue pieces to keep them from tearing during repeated use.

Rules of the Game

  • Always read the instructions for your fusible product, as temperatures vary for adhesion. Some products require the use of moisture for secure fusing, while others demand dry heat. Some also require a press cloth.
  • It’s a good idea to pre-wash your project fabric, as finishes can sometimes play havoc with fusible adhesives.
  • Always test-fuse to your project fabric before committing to a product’s use. Let the swatch cool and see how you like the feel of the combined layers—is it too stiff, or too soft; does it drape like you want?
  • Keep iron cleaner nearby and cover your ironing surface, as it never fails that there’s some errant fusible adhesive finding its way off the intended course.
  • When fusing, apply firm pressure and lift the iron to the next location, slightly overlapping the first position—don’t slide it, as you can create wrinkles. Allow the fused piece to cool before moving it.

~Linda Griepentrog
Linda is the owner of G Wiz Creative Services and she does writing, editing and designing for companies in the sewing, crafting and quilting industries. In addition, she escorts fabric shopping tours to Hong Kong. She lives at the Oregon Coast with her husband Keith, and two dogs, Yohnuh and Abby. Contact her at gwizdesigns@aol.com.
This field is for validation purposes and should be left unchanged.
Did you enjoy this article?
Are you an ASG member?


Tagged With: fusible, fusible interfacing, fusible stabilizers, fusible webs, sewing

  • « Previous Page
  • 1
  • …
  • 5
  • 6
  • 7
  • 8
  • 9
  • …
  • 11
  • Next Page »

Become a Member

Join the only national organization dedicated to Advancing Sewing as an Art and Life Skill.

Join Now button

Blog Article Categories

  • ASG Conference
  • Chapter Stories
  • Embroidery
  • Fitting
  • Learn to Sew
  • National Sewing Month
  • Products, Books, & Patterns
  • Projects
  • Quilting
  • Sewing
  • Sewing Techniques
  • Sewing Tips
  • Sewing Tours
  • Videos
  • Disclaimer
  • Privacy Policy

American Sewing Guild
National Headquarters
9660 Hillcroft, Suite 230
Houston TX 77096
713-729-3000 | 713-721-9230 Fax
www.ASG.org

ASG wordcloud - education, conference, discounts, videos, special offers, tours and more

Copyright © 1998–2026 · American Sewing Guild · All Rights Reserved