American Sewing Guild (ASG)

Visit our blog Visit the ASG Facebook page Visit ASG on Pinterest Visit ASG's YouTube channel Visit ASG on Instagram
  • Home
  • Join ASG
    • Join Online
    • Chapter Locations
    • Member Benefits
    • Member Brochure
    • Join by Mail
  • Conference & Education
  • Resources
    • Contests & Awards
    • Giving Back
    • Hall of Fame
    • Links
    • Travel and Tours
    • Measurement Chart
  • Shop
    • ASG Store
    • Chapter Products
    • Video Resources
  • Blog
  • About
    • About Us
    • Donate to ASG
    • ASG Sensitivity Statement
    • FAQ’s
    • Start a Chapter
  • Contact
  • Member Login
    • Login First!
    • Members Only
    • Leadership Only
    • Website FAQ’s
    • Logout
  •  

October 22, 2021

Decorative Stitches, Part 2: In the Hoop

Decorative stitches on a sewing machine
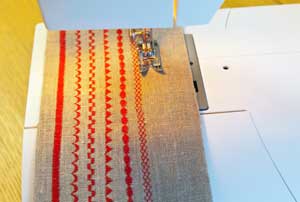
Have you ever tried to use the decorative stitches on your sewing machine and some of them bunched up or didn’t stitch evenly, or you ended up with crooked rows? The really wide stitches can be especially tricky to keep centered where you want them. The best option for a quality result is to bring them into the hoop. The result of using embroidery mode will be perfectly balanced columns of stitches, and you’ll be even happier with the ease of stitching and the precision-aligned results.

The first thing to do is check your manual to see if your machine can load sewing stitches into the hoop in embroidery edit mode. My Husqvarna-Viking Designer Ruby calls it “loading a stitch program.” On the Ruby, the stitches come into the hoop in vertical alignment but can be rotated to the horizontal position after they’re brought into the hoop. The Ruby also allows you to program how many times to repeat the stitch, as well as providing an opportunity to choose different stitches to use in a particular column of stitches. Alternatively, you can use just one of the fancy stitches by itself and then duplicate it and arrange them in the hoop. (Note that your machine may or may not have these options.)

Getting Started

Consider what hoop size you want to use and make note of the hoop’s stitch area measurement. For example, the Ruby’s 130 x 180 hoop would use a design that is just slightly smaller in size. It could fit a series of stitches that measured up to 178 mm. The Ruby also reports the size of one “stitch unit,” as well as the combined size of the column of stitches being created. In addition, you can edit the stitch length and width of an individual unit of stitches to make them fit, if needed, as well as tell it how many repeating units are desired.

Notes:

  • The machine automatically starts and ends with “tie off” stitches for the column of stitches. Check to see if you need to add that on your machine.
  • It is very helpful if you can zoom in on your machine’s screen when aligning multiple columns of stitches.

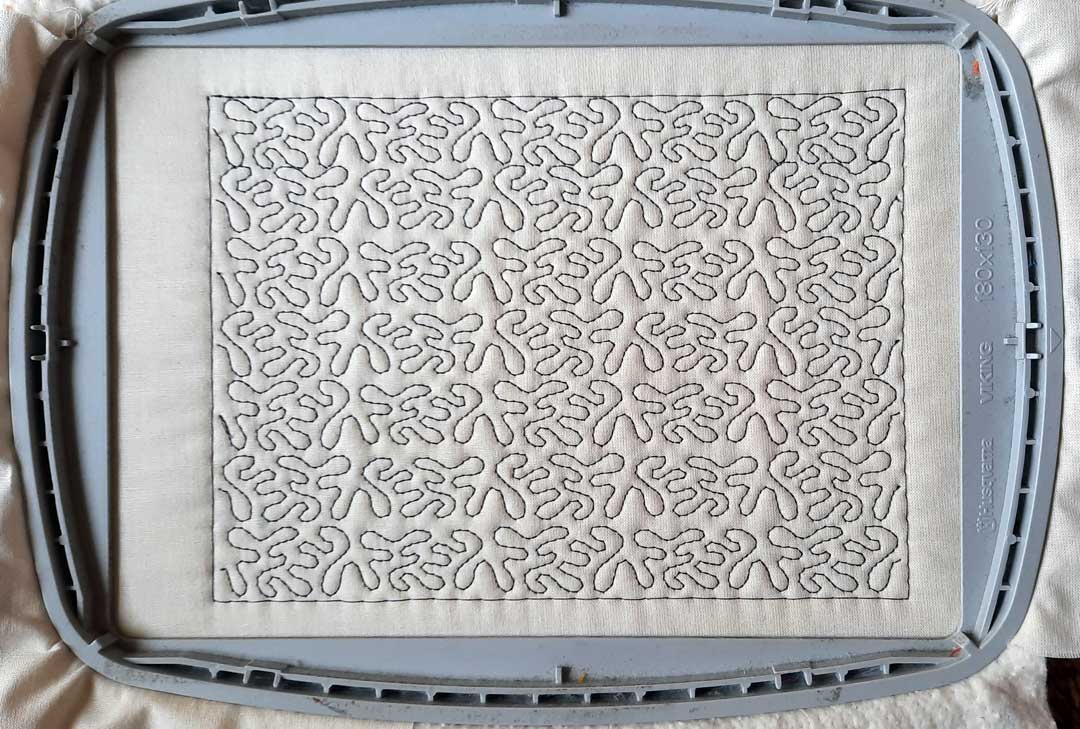
From the machine’s screen… to stitchout

Decorative Stitches

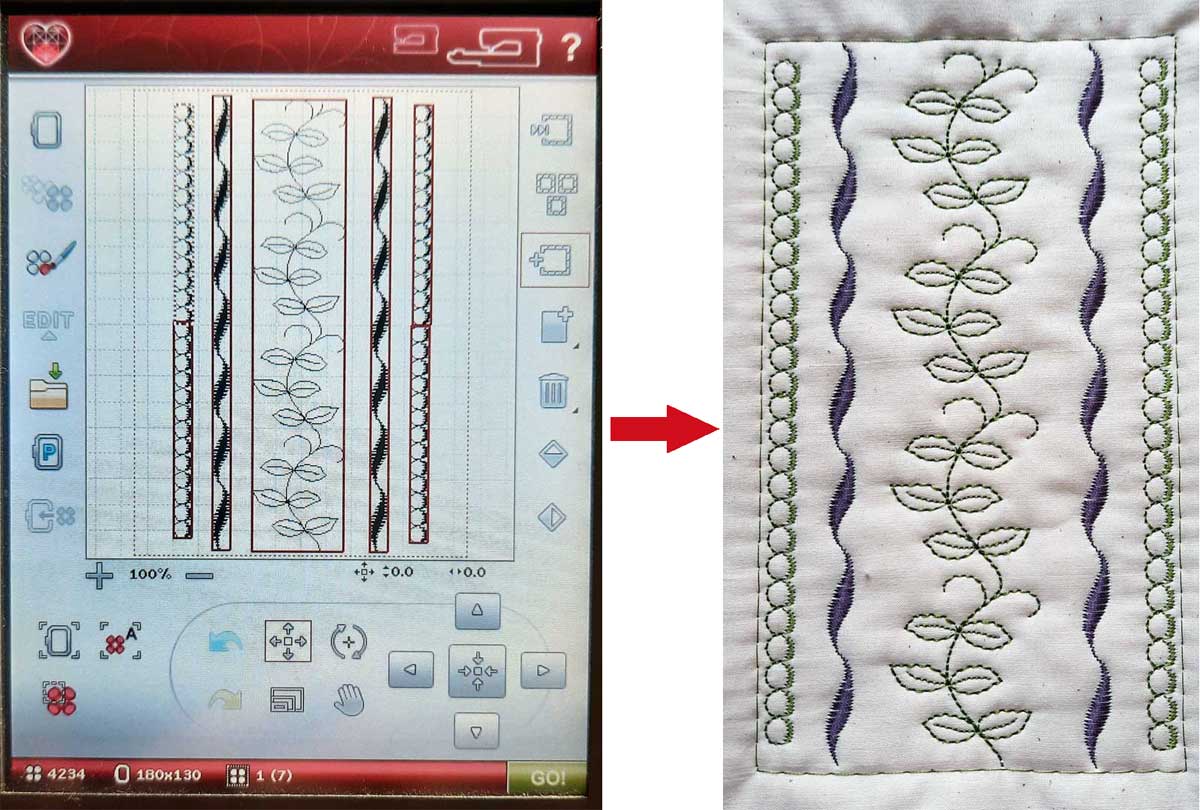
Some stitch units are merely running stitches and some may be triple stitch, or have some satin stitches, meaning some are more dense than others. For some of the samples that I created, I did not use stabilizer in the hoop, but just had a quilt sandwich of two fabrics with batting in the middle. If you are embroidering on one layer of fabric, you will need to use stabilizer in your hoop. Starching your fabric helps too.

  • It is highly recommended to stitch a sample before using on your final fabric.
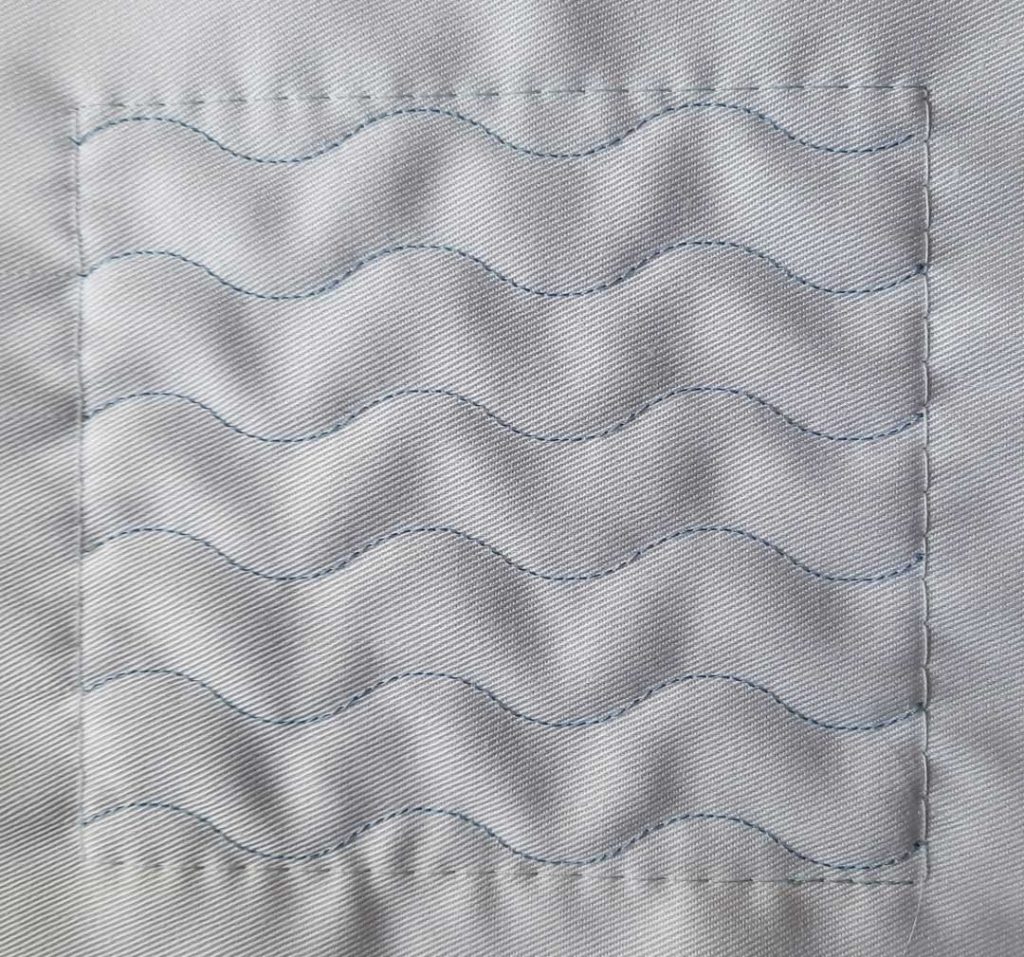
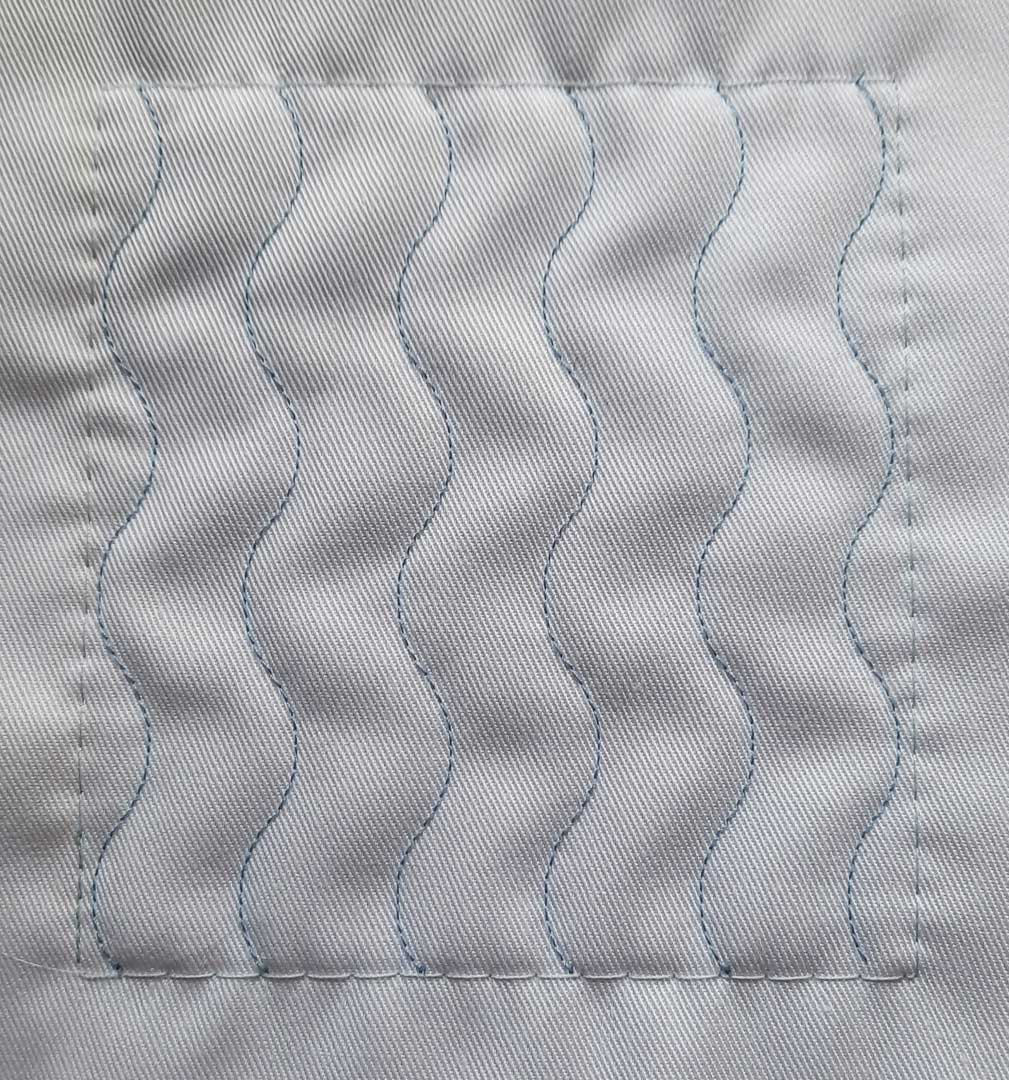
  • Use a serpentine stitch to create wavy lines — arrange them in vertical or horizontal or diagonal rows to fill your hoop space.Sample serpentine stitches
  • Write words with built-in alphabet letters to use as background stitching.
  • If your machine has stitches that look like stippling, create rows of stippling using thread that matches your fabric and then add another design on top of that. (darker color thread was used in this sample so that it shows up)

Stippling effect

If you are not sure if your embroidery machine can do this, do a Google search on “using decorative stitches in the embroidery hoop,” and you should find links on how to do it for a variety of machine brands. You can also do a Google search using the term “stitch stacking.” Your sewing machine dealer may also be able to determine if your particular model has the ability to do this technique.

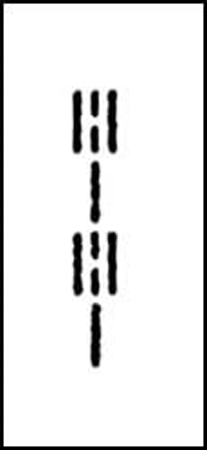
Check to see if your machine can create a hand look stitch (see image at right). The stitch symbol may look something like this. When stitched using the correct color threads, it looks like a row of small stitches sewn by hand. Thread the bobbin in a contrasting color so that the threads will show on the top of your fabric. Thread the needle with a thread color that matches the fabric or with clear/invisible thread. Select the stitch and try sewing a sample first. You may have to increase the needle tension so that the bobbin thread shows more. The stitch length may also need to be adjusted to get the effect you are looking for.  They are great for creating lines of stitches and may be brought into your hoop to give the look of quilting by hand.

For more information on using decorative stitches in the embroidery mode on machines, check out the following sources:

  • Quilting Using Decorative Stitches with Husqvarna-Viking Designer Epic
  • Decorative Stitches with Babylock Solaris
  • Brother Dream Machine – Stacking Decorative Stitches (video)


~Beverly Betz

Did you enjoy this article?
Are you an ASG member?
This field is for validation purposes and should be left unchanged.

Tagged With: decorative stitches, embroidery hoop

October 15, 2021

Fabric Sources: Wool

This article is Part 2 of the Fabric Sources: Living Things series

Plants (part 1) | Plants (part 2)
Living Things: Silk | Living Things: Wool | Other Living Things
Minerals: Acrylics, Polyester, & Nylon (part 1) | Minerals: Spandex and Rayon (part 2)

When you think of wool, you probably think of sheep, but did you know that the hair of some other mammals such as goats, alpacas, and rabbits may also be called wool? Let’s look at all of these, starting with sheep since it is the most common and affordable.

Sheep

The hair of sheep is the most commonly used animal fiber. Merino wool is most prized as it is a particularly soft and warm fiber. Wool varies in diameter — the finer the wool, the softer it will be, However, coarser grades are more durable and less prone to pilling.

How is it processed?

Example of wool from shearing a sheep

Sheep are shorn of their wool usually once a year. After scouring to remove grease and dirt, wool is carded and combed, then spun into yarn for fabrics or knitted garments. While on vacation in New Zealand, I had the opportunity to stay on a sheep farm and see a sheep being shorn.  I was amazed at the amount of wool that came from a single sheep! To watch the process of taking shorn wool to wool fabric, watch this 7 -minute video.

Pros

Wool fabric is warm and insulating, making it a great choice for winter apparel. It is wrinkle and odor resistant, has good drape, and easily accepts dye. And its ability to absorb and release moisture makes woolen garments comfortable as well as warm.

Cons

Pure wool can be scratchy on the skin and must be dry cleaned to avoid shrinking and felting (become more compact/dense). However, this felting effect can be used to your creative advantage if that is the effect you are going for.

Impact on the sheep

Shearers are often paid by volume, which encourages fast work. Shearers are encouraged not to be hasty and careless so that no injuries occur to the sheep.

Where can I buy it?

Wool is readily available almost anywhere.

  • The Sewing Place

Goats

Goat hair is the source of two luxurious fabrics – cashmere and mohair. Cashmere, also known as Pashmina, is made from the downy undercoats of the Cashmere goat. It is a very insulating fabric and can be woven in light or heavy weights. Mohair is made from the hair of the Angora goat and is known for its silky feel and beautiful sheen.

How is it processed?

Cashmere goats are sheared once a year in the Spring and produce a smaller volume of wool per shearing than the Angora goat. It takes the hair of approximately 6 goats to produce a single cashmere jacket. This hair is combed out over a period of about two weeks’ time and is then collected, cleaned, and processed. The combing process only harvests the finest undercoat hairs. For a chance to see these cashmere goats, watch this 2-minute video.


Angora goats can be sheared twice a year as the hair grows much more rapidly than the Cashmere goat. Plus, these goats produce more volume per shearing than the Cashmere goat. The mohair is scoured, carded, and sometimes combed, much like wool. Although angora goats are raised for mohair around the globe, the two major producers are South Africa and Texas. Watch a Texas farmer talk about raising and shearing his Angora goats in this 2 ½ minute video.

Pros

  • Cashmere is prized for its softness and fine quality. It is warmer than sheep’s wool yet lightweight, breathable, and less irritating to the skin. It is also wrinkle-resistant.
  • Mohair also possesses qualities such as warmth, lightweight, wrinkle-resistance, and softness. It is dyes exceptionally well, and it is more durable and affordable than Cashmere.

Cons

Cashmere is a luxurious fabric which means it is an expensive one. Its delicate nature means you will want to dry clean it and store it folded rather than hung. Like wool, pilling can be an issue. Mohair is also an expensive fabric option, though less than cashmere. It is not as soft as cashmere and can have a slightly frizzy look.

Impact on the goats

Shearing (most common) can be stressful to the goats and robs them of their natural insulation. This could leave them vulnerable to cold temperatures and illness so weather should be considered when planning the shearing schedule. Combing is an option but requires more time and physical effort and is thus less common.

  • Mohair production is stimulated by a high protein diet. However, as protein in the diet increases, so does the fiber diameter, which is an undesirable side effect. Nutrient requirements for mohair are relatively low. The Angora goat is extremely sensitive to undernourishment, especially during reproduction and must be taken in to consideration.
  • Cashmere goats produce only a small amount of finer fiber relative to mohair and are less sensitive to environmental stress.

Where can I buy it?

Both cashmere and mohair fabrics can be found in many upscale fabric shops. You will need to look a little harder to find them, but they are available.  A few sources are listed here:

  • Mendel Goldberg
  • Mood Fabrics

Alpacas

Alpaca fiber is sourced from the wool of alpaca, a variety of camel native to Peru. Its wool is soft, very warm, and can be blended with wool, mohair, and silk to create beautifully soft, high-end textiles. Certain premium alpaca fibers shorn from young animals are even considered lighter, warmer, and softer than cashmere. Generally, alpaca wool is available in white; however, colors such as blackish blue, brown, silvery gray, and blackish brown are also found.

How is it processed?

Alpacas are shorn once a year. The fiber is washed to remove sweat and oils, then dried and sent through the picker to open the fleece and prepare it for carding. Carding will separate the fibers and drop out the less desirable hairs. The result of this step is a thin sheet, called a web, which is wrapped around a drum to form batts or run through a pair of rollers to form a loose tube, called roving. Next comes the combing which aligns the fibers neatly into slivers which can be spun. Once the slivers are spun, they can be twisted into multi-ply threads/yarns which are now ready to be wound onto cones and woven or knitted into fabric. Watch this 4-minute video on YouTube if you would like to see a bit of the shearing and processing described.

Pros

Alpaca wool is warmer, lighter, and stronger than sheep’s wool. It is soft, fine, glossy, and luxurious. Another advantage is that it is hypoallergenic.

Cons

Alpaca fabric is typically expensive, and it can be itchy. It is also susceptible to moths so it must be stored in a manner to protect against them.

Impact on the animals

Raising alpaca has less of an impact on the environment as compared to other wool-bearing animals. However, as with any animal, if the farmer is not committed to quality and gentle animal care, they can experience harsh treatment during shearing.

Where can I buy it?

As with cashmere, you will need to look in upscale shops to find this luxury fabric. I found it listed in these online shops:

  • Tissura
  • Mood Fabrics
  • B&J Fabrics

Rabbits

image of an angora rabbit
Angora rabbit

Angora fiber refers to the soft down coat produced by the Angora rabbit. Angora wool has been used in the production of sweaters and suits for quite some time and it’s an ideal fiber for thermal clothing and for people suffering from arthritis and wool allergies.

How is it processed?

Angora wool is harvested during molting season, which happens three to four times yearly. It is harvested by shearing or plucking the rabbits. Careful and gentle plucking of the shedding hairs is a better harvesting technique as it reduces the number of guard hairs retrieved, adding to the roughness of the coat. Removing the loose wool also helps to prevent wool block from the rabbit grooming itself and ingesting the loose wool fibers.

The premium wool is taken from the back and upper sides of the rabbit. Fiber quality diminishes on the belly and neck, and further diminishes on legs and rump. Angora rabbit wool is ready to shear when it has grown to between 3 and 5 inches in length.

Once collected, the fibers are carded and spun before being dyed and finally woven or knitted into a fabric. The fineness of these fibers makes them quite difficult to spin.

Pros

Angora is prized for its softness, quality, and fluffiness. The fiber also felts very easily. It absorbs water well and is easily dyed.

Cons

Garments made of 100% angora wool are sometimes considered too warm so it is usually blended with other fibers, such as wool. It is very expensive since production is costly and time consuming. In addition, the rabbits need a lot of maintenance for their fur to be in top condition.

Angora yarn

Impact on the animals

Angora rabbits raised in large operations are intensively farmed in hutches, usually in semi-darkness, and often experience cruelty, abuse, and intense stress during the farming and wool removal experience. The extremely long furs are best removed gently by hand to help preserve the health of the rabbit; however, this is quite time-consuming and many farmers will shear instead.

Where can I buy it?

As you might expect, this is another fabric you are only likely to find in upscale fabric shops. Here are a few I found:

  • Mood Fabrics
  • Tissura
  • B&J Fabrics

~Sheryl Belson

Did you enjoy this article?
Are you an ASG member?
This field is for validation purposes and should be left unchanged.

Tagged With: fabric, textiles, wool

October 8, 2021

Pressing Tools—Clapper and Sleeve Board

It doesn’t matter whether you tailor fine wool jackets or make casual everyday wear, or if you’re a quilter—getting a good press is of the utmost importance for a professional-looking project. There are tools to help with that process. Let’s take a look at two tools that work for all sewers and quilters—a clapper and a sleeve board.

Clapper

Mardili Hard Wood Tailors Clapper. The product shown is from Amazon. If you make a purchase, ASG may receive a small commission at no additional cost to you.

What is it?

A clapper is basically a long block of wood with curved edges. The block may have indentations along the side for easier holding, but the bottom surface if totally flat. Clappers come in different sizes, depending on where they’ll be used.

It’s important that the clapper is made from hardwood with a heavy, closed grain so that it holds heat and steam in whatever you’re trying to press beneath it. Maple is a common wood used for clappers. All clappers should be unfinished wood, to avoid transferring any oils or finishes to the fabrics below.

What is it for?

Fashion sewers and quilters use a clapper to flatten and compress seams, creases and hems. It’s helpful for flattening edges, like tailored collars on jackets and cuffs. Some people use a clapper to create precise creases in pant legs. Quilters use clappers to help flatten seams, whether pressed open or to one side, and to make sharp seam edges in foundation piecing projects.

How does it work?

A clapper is used in conjunction with an iron, either steam or dry. If you’re using a dry iron, spray the area with water to moisten it before pressing and clappering.

Once the area is pressed with the iron and infused with steam, press the clapper down on top of the area to trap the moisture in the area until it cools. Apply pressure if you’re pressing a thick edge like a collar, lapel or cuff.

Sleeve Board

sleeve board

What is it?

A sleeve board is basically a small wooden ironing board, usually with padding on the upper surface. The wooden base usually isn’t padded, but provides an optional pressing surface should a harder surface be needed.

Some sleeve boards have metal grids under the upper padding and some have metal legs instead of being reversible flat surfaces.

What is it for?

The name doesn’t say it all, but it does note its original purpose—pressing sleeves, without getting extra creases where you don’t want them. But, it’s also handy for pressing pant legs and other tubular type sewing projects where you don’t want additional creases added to the area. For crafters, a sleeve board is handy for pressing wine bags or other narrow drawstring type bags where accessing seams can be challenging.

A sleeve board can also be used for any pressing task where a full-size ironing board might not be needed—like pressing doll clothes, or quilt blocks.

How does it work?

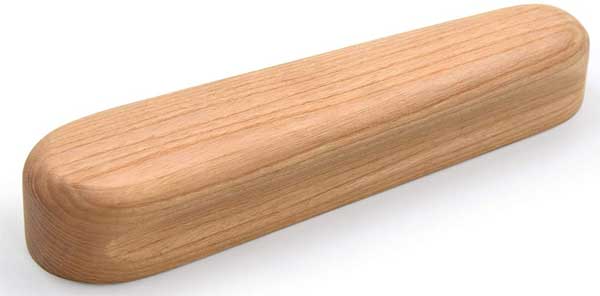
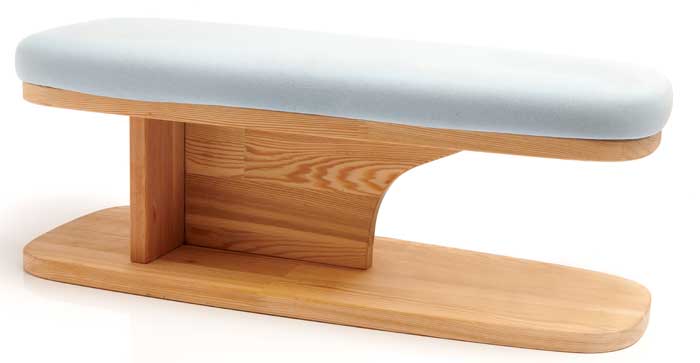
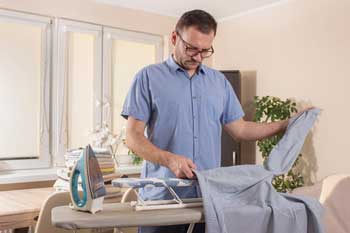
Sleeve board sizes vary depending on the manufacturer, and the size of the pressing surface obviously affects what can fit over it. But all sleeve boards have at least one end tapered so that it’s narrower than the opposite end attached to the base.

  • To use the sleeve board, simply slide the sewn tubular shape over the narrow end of the board and onto the padded pressing surface.
  • A sleeve can actually be pulled over the smaller curved end to lightly press the cap area during construction.
  • If you’re sewing with limited space, like at a retreat, a sleeve board can be used as your personal tabletop ironing board to save time waiting in line for the main ironing board.

~Linda Griepentrog
Linda is the owner of G Wiz Creative Services and she does writing, editing and designing for companies in the sewing, crafting and quilting industries. In addition, she escorts fabric shopping tours to Hong Kong. She lives at the Oregon Coast with her husband Keith, and two dogs, Yohnuh and Abby. Contact her at .

Did you enjoy this article?
Are you an ASG member?
This field is for validation purposes and should be left unchanged.

Tagged With: clapper, iron, quilting, sewing, sleeve board, sleeves

October 6, 2021

What I’m Sewing: Alba Jacket

Pink jacketThank you to Kim Caywood from the Central Illinois chapter for sharing her information on working with the Alba Jacket pattern from Sinclair Patterns. We love this unique jacket. And it looks quite cozy, too!

Q. Item Created 
A. Jacket

Q. Independent Pattern Designer
A.
Sinclair Patterns

Q. Name and Number of Pattern
A.
Alba Jacket

Q. Fabric Used:
A. French Terry and Quilted Knit

Q. Special Embellishments/Notions Used
A. Zipper

Q. Skill level required?
A.
Confident Beginner

Q. Are the instructions easy to follow?
A.
Instructions are easy to follow and have step by step pictures. They also have a Facebook group where you can ask questions if you have an issue with construction.

Q. Are you pleased with the finished result?  Did it meet your expectations?
A.
I love the way this turned out. I am always skeptical about installing zippers but this turned out great

Q. Did it look like the picture?
A.
Yes it did

Q. Did you make any modifications in the pattern?
A.
As this was a pattern test, modifications were not allowed

Q. Are there any changes you would have made?
A. I might have used a fabric with less drape for the collar

Q. Did the pattern teach you any unique or special techniques?
A.
Inserting an asymmetrical zipper

Q. Would you make this again?
A.
I would make this again

Q. Would you recommend this pattern to others?
A.
I would highly recommend Sinclair Patterns to anyone. They come in Petite, Regular and Tall sizing and in sizes from XXS to 4XL

Pattern Link: https://sinclairpatterns.com/products/alba-zip-up-knit-asymmetrical-jacket-with-a-cowl-and-side-pockets-pdf?_pos=1&_sid=3c9c05b83&_ss=r


Did you enjoy this article?
Are you an ASG member?
This field is for validation purposes and should be left unchanged.

Tagged With: alba jacket, pattern

October 1, 2021

Pinking Shears—A Cut Above

Pinking shears
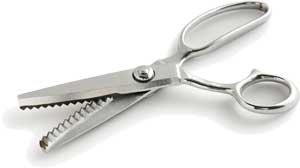
Chances are good that if you’re serious about your craft, you have multiple pairs of scissors and shears in your sewing tool arsenal, and that may include at least one pair of pinking shears. These specialty shears have blades that cut fabric in a mini-zigzag or sawtooth pattern instead of just a straight line like most shears. But, how do you use these funny-looking shears?

Pinking Shear Savvy

The primary purpose of these zigzag-tooth shears is to trim fabric and keep it from fraying. When you cut a straight-grain line with the shears, each of the little zigs and zags has bias edges, and bias doesn’t fray or ravel under normal conditions. So, probably the most common use is to trim seam allowances to help keep raveling in check on the inside of a garment. They can also be used on hem and facing edges. When using pinking shears as an edge finish, there is no additional bulk (like stitches or binding) so the seam edge remains flat.

fabric cut with pinking shears

In addition to creating a less bulky seam finish, the edge configuration helps prevent imprinting on most fabrics. What’s imprinting? When you press a seam open, or press both seam allowances in the same direction, the seam allowance edges create a “drop-off” point and the difference in thickness can show on the outside of the garment. This is called imprinting, as there’s a slight indentation along the pressed edge line. Using pinking shears on the seam allowance softens it and reduced the more prominent drop-off edge.

But what if you want to sew your seam with wrong sides together instead? Yes, you can trim the seam allowances with pinking shears and have the little zigzags showcased on the outside of the garment instead (usually sewn down with a row of straight stitching). In this scenario, the wrong side of the fabric shows, so be sure it’s OK to be seen—a perfect technique for double-faced fabrics.

During construction, pinking shears can be a handy way to reduce bulk in an inside or outside curve, such as a collar or neckline. Traditional construction has us clipping outside curves, notching inside curves, and trimming seams, but using pinking shears to trim a curve seam both notches and clips in one operation allowing for a smooth curve after final pressing.

Pinking shears can also be used to create decorative edges on non-fraying fabrics. Fleece, boiled wool, non-woven faux suedes (like UltraSuede), felt, vinyl and leather are ideal candidates for a simple pinked edge finish. The pinking can also be combined with a row or two of straight stitches, or even decorative stitch accents.

edges cut with pinking shears

Pinking shears can also be used to finish appliqué edges, especially on non-ravelling fabrics. That saves turning under edges, or encasing the edges with stitches. Following that same principle, pinking both edges of a strip can create a trim band suitable for strapping a seam. The strip can be sewn on, or fusible web applied before trimming with the pinking shears yields a fusible trim band.

Guidelines

Pinking shears can be used to cut one or two layers at a time, depending on the fabric weight. So, finish seam allowances singly or together depending on how your shears work with a particular fabric—keyword: testing. If the shears tend to chew the fabric, cut only a single layer at a time.

Because these specialty shears are cutting little teeth, it’s a good idea to align the teeth as you cut for a continuous look. Note that some brands of shears have one blade longer than the other so the zigzags can’t be cut all the way to the end. In addition, the zigzags may not go all the way to the hinge point. But, either way, cut with long strokes and align subsequent cuts to form complete and continuous zigs and zags.

Care and Feeding of your Pinking Shears

  • Like most scissors and shears, pinking shears need a drop of oil occasionally in the hinge area for smooth operation. Keep the oil off the blades so that it doesn’t damage your fabric, and wipe away any excess before use.
  • Keep the blades free of lint for the sharpest cut.
  • Do not use pinking shears on paper or to actually cut out your projects. Cut the project with regular shears, then use the pinking shears for finishing.
  • Store pinking shears in a case or fabric pocket to protect the blades from damage and take care to avoid dropping them.

Look-alikes

In addition to pinking shears, other decorative-edge shears are also available with scallop or wave blades. They can be used in the same manner but are more often used for decorative edges.

Novelty rotary cutting blades are also available in pinking, scallop, or wave configurations.

crafting scissors
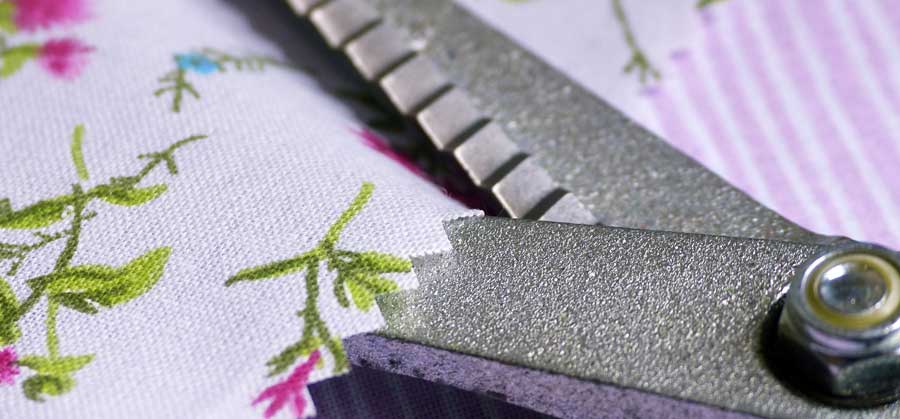
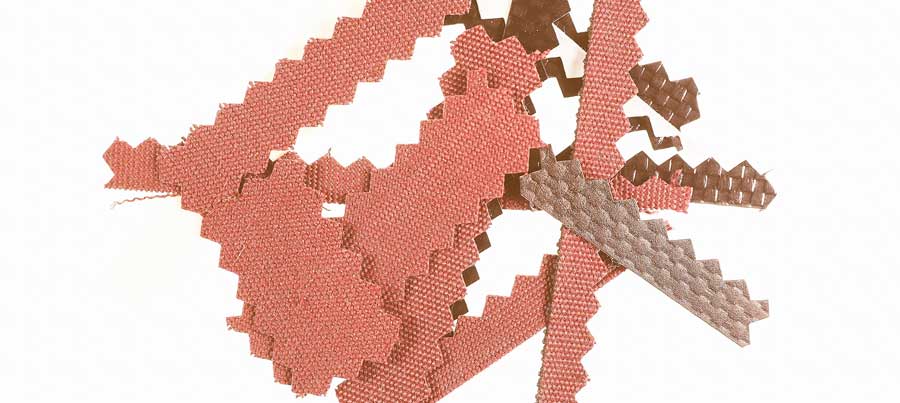
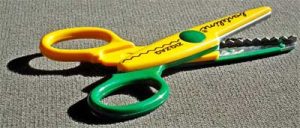
If you wander into the scrapbooking department, you may see paper edgers—these small scissors are designed for use only on paper and cardstock, not for fabric. The blades on these edge finishers may look like pinking, scallops, waves or more elaborate trim options, but they will not cut most fabrics cleanly.


~Linda Griepentrog
Linda is the owner of G Wiz Creative Services and she does writing, editing and designing for companies in the sewing, crafting and quilting industries. In addition, she escorts fabric shopping tours to Hong Kong. She lives at the Oregon Coast with her husband Keith, and two dogs, Yohnuh and Abby. Contact her at .

Did you enjoy this article?
Are you an ASG member?
This field is for validation purposes and should be left unchanged.

  • « Previous Page
  • 1
  • …
  • 33
  • 34
  • 35
  • 36
  • 37
  • …
  • 62
  • Next Page »

Become a Member

Join the only national organization dedicated to Advancing Sewing as an Art and Life Skill.

Join Now button

Blog Article Categories

  • ASG Conference
  • Chapter Stories
  • Embroidery
  • Fitting
  • Learn to Sew
  • National Sewing Month
  • Products, Books, & Patterns
  • Projects
  • Quilting
  • Sewing
  • Sewing Techniques
  • Sewing Tips
  • Sewing Tours
  • Videos
  • Disclaimer
  • Privacy Policy

American Sewing Guild
National Headquarters
9660 Hillcroft, Suite 230
Houston TX 77096
713-729-3000 | 713-721-9230 Fax
www.ASG.org

ASG wordcloud - education, conference, discounts, videos, special offers, tours and more

Copyright © 1998–2025 · American Sewing Guild · All Rights Reserved